I'm in the process of resurrecting a low km GPX750R/ZX750F1 which has sat for a long time and the fuel has gunked up and caused some corrosion.
The petcock is not too bad and could be ok with a seal kit, but I like the idea of swapping in another tap which has a proper manual shutoff and/or reserve position (prime would be a bonus) in addition to the standard vacuum operation.
The petcock flange to the tank looks pretty common to other Kwaks of the era so I am wondering if there is a fuel tap from another model which will fit into the limited space available and provide some extra manual control.
I've cleaned the carbies the best I can and may get to reassemble them and refit fit them over Chritsmas but before I lash out on a fuel tap seal kit (the original O-ring was sort of melted, the diaphragm stretched a bit), I'm investigating alternatives to the stocker.
Before taking the carbies off, I did get the engine running on 2 and eventually 3 cylinders. The engine sounded like it had a rattly camchain. After taking the cam cover off, I found that the bolts for the cam bearing caps were in various stages of looseness. Once the bolts were torqued up the engine sounded like a new one, so that was a win. I'll get around to checking the valve clearances eventually.
GPX750R resurrection
GPX750R resurrection
Last edited by Mister_T on Thu Dec 31, 2015 3:27 pm, edited 1 time in total.
Re: GPX750R petcock alternatives?
The yellow/green coating on the carby internals is hard to shift, carby cleaner hardly affects it although soaking the jets in it for a week or so helps. The yellow/green seems to scrape off like paint out of the float bowls.
Agitating the jets in white vinegar seems to get a bit more off. If I did this for a living I would definitely spring for an ultrasonic bath.
Got the carbys into the bike on the weekend. Getting the carbys in is a lot easier than getting them out. I made a special tool out of a couple of sheets of thin ally and lubed them with some vaseline. I was going to use rubber grease but I couldn't find that so the vaseline was used which shouldn't bother the rubber anyway.
I put the ally sheets against the rubber adapters on the airbox and engine and shoved the carbys between them, then pulled the sheets out and the carbys slid into place.
I have to wonder how the factories assembled bikes on the production lines.
Agitating the jets in white vinegar seems to get a bit more off. If I did this for a living I would definitely spring for an ultrasonic bath.
- Yes, those are little spice jars I keep the jets in, the only good excuse to have a spice rack in a man-cave.
I put the ally sheets against the rubber adapters on the airbox and engine and shoved the carbys between them, then pulled the sheets out and the carbys slid into place.
I have to wonder how the factories assembled bikes on the production lines.
- Now I have to remember how all the rest goes back together.
Re: GPX750R petcock alternatives?
Did a bit more work on the old sled.
Changed the oil and filter, and while the bellypan was off I stuck my head under to see what exhaust there is on it. Turns out to be a stainless Motad 4-2-1.
I like 4-2-1. What don't like is a badly fitted 4-2-1. One of the oil cooler pipe's hose swage was touching #2 header. $#%&*!
Of course the collector also touches the frame. That might take a bit more agro to fix.
While the tank is off I had a look at the the fuel gauge sender. Rust city.
The wiper and resistance wire are actually in decent condition. Too bad one terminal has corroded completely away, the other corroded enough to let go of the wire. If it were the last guage sender on the planet then I suppose it would be fixable. Until then, the tripmeter will have to do.
Plenty more to do before rego.
Maybe I'll remember where I put my camera so I don't have to take pics with the phone.
Changed the oil and filter, and while the bellypan was off I stuck my head under to see what exhaust there is on it. Turns out to be a stainless Motad 4-2-1.
I like 4-2-1. What don't like is a badly fitted 4-2-1. One of the oil cooler pipe's hose swage was touching #2 header. $#%&*!
- A bit of leverage, loosen the banjo bolt on the cooler, retighten and there is now clearance. How hard was that? Too hard for someone.
- Grrrr.
- The rust mice have been nibbling on this. Some of it is would be making the petrol brown, methinks.
- gpx750r_Fuel_guage_sender_1a.jpg (88.4 KiB) Viewed 84030 times
- It's toast.
- gpx750r_Fuel_gauge_sender_3a.jpg (113.42 KiB) Viewed 84030 times
Maybe I'll remember where I put my camera so I don't have to take pics with the phone.
-
Kwakked Up

- VIP MEMBER

- Posts: 580
- Joined: Mon Jan 10, 2011 2:18 pm
- Bike: ZX10R
- State: New South Wales
- Location: Goulburn
Re: GPX750R petcock alternatives?
Funny how there is so much more work than you think when you start fixing the older beasties.
Good luck with it.
Good luck with it.
06 zx10r - road
99 zx7r - trackie
77 z1000 - project
99 zx7r - trackie
77 z1000 - project
-
pkay
- KSRC Member

- Posts: 158
- Joined: Thu Jan 30, 2014 1:13 pm
- Bike: ZXR750
- State: Queensland
- Location: Brizvegas
Re: GPX750R petcock alternatives?
Yes you can see where the unexpected resto starts!
PK
"Too many bikes is never enough"
ZXR750H1,GPX750R,GPz600R,750,900R,1000RX,KR250,Z1a,Mach3,Z1300 and..
"Too many bikes is never enough"
ZXR750H1,GPX750R,GPz600R,750,900R,1000RX,KR250,Z1a,Mach3,Z1300 and..
Re: GPX750R petcock alternatives?
Thought I'd throw up a pic of the original fuel tap.
Original is on the left. The one on the right is from a GPX250 (I think).
The original O-ring is rooted, and stuck in the housing. Not much chance this tap was going to work properly.
The 250 O-ring is much nicer and is located where it is supposed to be. The parts swapped over easily. I like it when parts follow a common pattern.
Next pic, I got the bike running on a test bottle. It started first click and apparently on all cylinders which made me feel good.
The pilot screws were all set to book initial spec of 2.5 turns out. At least I think it is, I only have the German FSM floating around the 'net to go by.
Then it ran not so good. Somewhat inconsistent.
Might as well wear a matching flanno shirt while working on it. White cotton gloves? Isn't that how a Jap mechanic would work on a Jap bike?
The longer it ran, the worse it seemed to get. I've been racking my brains trying to figure out what I did wrong.
Wouldn't it be nice if somebody made aftermarket float bowls made of clear plastic? You can get aftermarket fuel filters housed in clear plastic so the material science must be up to it.
Sure, I can attach some clear fishtank tube to the float drains and open up the drain screws to get a rough idea of the float levels, but that's not the same.
So it struck me that maybe the venting on the fuel test bottle is not up to scratch, as in non-existent. Duh.
When It's not so steenking hot I may just chuck the real fuel tank on and see what happens.
If that doesn't help, maybe I'll fill the carbys with neat carby cleaner and give it a run. CC is plenty combustible enough to run on.
And if that doesn't improve things, I may have to poke my infra-red thermometer at each header pipe and see which one/s is/are cooler than the rest and take it from there.
The original O-ring is rooted, and stuck in the housing. Not much chance this tap was going to work properly.
The 250 O-ring is much nicer and is located where it is supposed to be. The parts swapped over easily. I like it when parts follow a common pattern.
Next pic, I got the bike running on a test bottle. It started first click and apparently on all cylinders which made me feel good.
The pilot screws were all set to book initial spec of 2.5 turns out. At least I think it is, I only have the German FSM floating around the 'net to go by.
Then it ran not so good. Somewhat inconsistent.
- Used a mate's iPhone for this pic.
The longer it ran, the worse it seemed to get. I've been racking my brains trying to figure out what I did wrong.
Wouldn't it be nice if somebody made aftermarket float bowls made of clear plastic? You can get aftermarket fuel filters housed in clear plastic so the material science must be up to it.
Sure, I can attach some clear fishtank tube to the float drains and open up the drain screws to get a rough idea of the float levels, but that's not the same.
So it struck me that maybe the venting on the fuel test bottle is not up to scratch, as in non-existent. Duh.
When It's not so steenking hot I may just chuck the real fuel tank on and see what happens.
If that doesn't help, maybe I'll fill the carbys with neat carby cleaner and give it a run. CC is plenty combustible enough to run on.
And if that doesn't improve things, I may have to poke my infra-red thermometer at each header pipe and see which one/s is/are cooler than the rest and take it from there.
Re: GPX750R resurrection
With the tank on and some juice in it, the carbs filled and the bike started nicely. Then petrol was dripping on the ground. The left overflow hose was pissing petrol.
A handy plastic jerry caught the excess. At least the fuel tap seemed to be working as the flow would stop after the engine was stopped.
At one stage while I was watching the black bus run like crap, I noticed that the tacho needle would jump a bit occasionally.
That aint no carby issue, so the multimeter gets an airing.
Secondaries ok, primaries were both about 3.3 ohm which is out of spec in the German FSM which lists 1.8-2.8 ohm. Both coils look original, light grey TEC KP05 items, no cracks in the case. I've had cracked coils in my Honda RC17 in the past.
The plug caps were all about 4.5 kohm except #4 which when first measured was 244 kohm. Huh? Other times it was measured it would come up the 76 kohm, 40-something kohm, occasionally about 4.5 kohm. Checked these measurements with another multimeter and got similar readings.
Ripped off a plug cap from a nearby GPX250 (also awaiting resurrection...) which metered at near 5 kohm and screwed that on. Wha-hey! It runs decently apart from the incontinent carby.
I let it warm up and expected the tank and carbs to run dry eventually.
The radiator fan came on at about 1/3rd up the temp gauge which seems a bit odd. My KLR600 had to go past the middle of the gauge before its fan would cut in.
However, the plastic jerry didn't fill up. I guess the heat and vibration convinced the offending float needle to start working.
Took it around the backstreets for a little test ride, didn't cane it, and it went ok, a little finesse on the pilot screws should have it smooth as.
Once I get back I check the disc temps with the back of my hand. The rear disc seems hotter than the fronts so off comes the rear caliper for some attention. A new year, and new problems.
Whoever designed the caliper to be so low to the ground should be forced to rebuild all the GPX750 rear calipers ever made.
A bit of excercise for the slide pins and they become more slidey than they were. The pistons lever back ok and all the rubber looks good so it should be ok for a while.
I think I got closer to roadworthy today.
While the seat is off and the engine running, I check the volts on the battery. At 1000-1100rpm idle I get about 14.3V which seems good. If I turn the parkers on the volts go up a few tenths. Umm, ok. If I turn on the headlight the volts go up more, up to around 14.8V. That's a new one to me, and I suspect that's near the limit of what the cheapy battery would be comfortable with.
I'm getting near enough to zero resistance between the negative battery post and the engine earth.
Is there some kind of known issue with the reg on these bikes? These regs sure aren't cheap.
It might take a bit of creative wiring to put an external MOSFET reg somewhere on the bike.
- Oops. This won't pass roadworthy.
- Reuse, recycle, regurgitate.
That aint no carby issue, so the multimeter gets an airing.
- Both coils are close enough to middle of the spec for my liking.
The plug caps were all about 4.5 kohm except #4 which when first measured was 244 kohm. Huh? Other times it was measured it would come up the 76 kohm, 40-something kohm, occasionally about 4.5 kohm. Checked these measurements with another multimeter and got similar readings.
- Bad plug cap, BAD. Grrr.
I let it warm up and expected the tank and carbs to run dry eventually.
The radiator fan came on at about 1/3rd up the temp gauge which seems a bit odd. My KLR600 had to go past the middle of the gauge before its fan would cut in.
However, the plastic jerry didn't fill up. I guess the heat and vibration convinced the offending float needle to start working.
Took it around the backstreets for a little test ride, didn't cane it, and it went ok, a little finesse on the pilot screws should have it smooth as.
Once I get back I check the disc temps with the back of my hand. The rear disc seems hotter than the fronts so off comes the rear caliper for some attention. A new year, and new problems.
Whoever designed the caliper to be so low to the ground should be forced to rebuild all the GPX750 rear calipers ever made.
A bit of excercise for the slide pins and they become more slidey than they were. The pistons lever back ok and all the rubber looks good so it should be ok for a while.
I think I got closer to roadworthy today.
While the seat is off and the engine running, I check the volts on the battery. At 1000-1100rpm idle I get about 14.3V which seems good. If I turn the parkers on the volts go up a few tenths. Umm, ok. If I turn on the headlight the volts go up more, up to around 14.8V. That's a new one to me, and I suspect that's near the limit of what the cheapy battery would be comfortable with.
I'm getting near enough to zero resistance between the negative battery post and the engine earth.
Is there some kind of known issue with the reg on these bikes? These regs sure aren't cheap.
It might take a bit of creative wiring to put an external MOSFET reg somewhere on the bike.
-
Smitty

- VIP MEMBER
- Posts: 10914
- Joined: Wed Apr 21, 2004 1:59 pm
- Bike: ZX12R
- State: Victoria
- Location: 3rd rock from the Sun
- Contact:
Re: GPX750R resurrection
... had a GPX750 for quite a number of years (super bike... much underrated)
and
never had an electrical problem... no issues with regs as far as I am concerned
and
never had an electrical problem... no issues with regs as far as I am concerned
GOTTA LUV the 12R!!
Re: GPX750R resurrection
Thanks for that, good to know.
I'll brush up on my German and figure out where the reg gets it volts sense from. I'm not used to seeing volts go up with load on.
I'll brush up on my German and figure out where the reg gets it volts sense from. I'm not used to seeing volts go up with load on.
-
Mitch

- VIP MEMBER
- Posts: 647
- Joined: Mon Apr 11, 2005 1:32 pm
- Bike: ZX9R
- State: Queensland
- Location: Ipswich
Re: GPX750R resurrection
Awesome write up. Good to hear/see the old bikes getting some much needed love and attention.
ZX9R F2 track bike aka Big Blue
www.bigmitchracing.com
www.bigmitchracing.com
-
Kwakked Up
- VIP MEMBER
- Posts: 580
- Joined: Mon Jan 10, 2011 2:18 pm
- Bike: ZX10R
- State: New South Wales
- Location: Goulburn
Re: GPX750R resurrection
Glad you changed the thread title Mister T, easier to follow the resurrection now
looking forward to following the build up.
looking forward to following the build up.
06 zx10r - road
99 zx7r - trackie
77 z1000 - project
99 zx7r - trackie
77 z1000 - project
Re: GPX750R resurrection
Underrated vehicles are apparently my speciality.Smitty wrote:... had a GPX750 for quite a number of years (super bike... much underrated)
There is a Honda CBX750F in my garage awaiting resurrection...
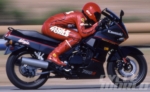
- Ah, thems were the days... The older I get, the faster I was.
- MRT_PI_600x404.JPG (47.44 KiB) Viewed 83926 times
- Thump thump thump, anywhere, anytime.
- MRT_Broadford_KLR.jpg (43.53 KiB) Viewed 83926 times
Re: GPX750R resurrection
Great reading i am also in the process getting an 89 GPX 750 up and going just started so far rebuild kits in all master cylinders ,calipers and clutch slave cylinder having replaced the front brake hoses with braided racing set up ( both hoses straight out of the master cylinder ) nightmare getting the air out of the system your more advanced with your rebuild than i am but look forward to hearing more about it best of luck Denis
Re: GPX750R resurrection
Hi folks,
Not much progress to report.
Still preparing for roadworthy.
The licence plate light was out, I discovered that getting to the wedgie bulb requires pulling out the whole licence plate light, which first requires pulling off the reflector which is not quite as simple as it sounds.
The blown bulb appears to be the original Koito part from the factory, but who knows how long it has been failed. It may not be such a long time as I measured a 1V drop from the battery to the wedgie socket.
A cleanup of the light switch might help get the volts back up.
I have thought about the regulator over-voltage situation and looked up where the regulator gets its sense from, somewhere off the switched +12V out of the the ignition switch. I'll probably have to insert a compact relay in the switched +12V to the regulator so that the regulator can get its sense direct from the battery without the losses through the standard wiring and ignition switch itself giving the regulator a falsely low volts indication.
Eventually I'll see about supplying the ignition coils +12V through a relay as well.
The bike does look nice when it is assembled but the engine does need a shine up. Some Syn-Lube "Bike Shine" that I have left over from the 80's should fix that.
I have not been able to figure out why the small side-panels at the rider's knees is a different colour to the rest of the bike. Plenty of pics of these bikes on the 'net show the same difference. Doesn't make sense and looks a bit bodgie.
The resurrection has stalled a bit as the bike's owner has suffered a few cardiac arrests recently requiring fairly substancial surgery. Come to think of it, the heart attacks occured not a very long time after he found out the current cost of a roadworthy in Victoria.
Not much progress to report.
Still preparing for roadworthy.
The licence plate light was out, I discovered that getting to the wedgie bulb requires pulling out the whole licence plate light, which first requires pulling off the reflector which is not quite as simple as it sounds.
The blown bulb appears to be the original Koito part from the factory, but who knows how long it has been failed. It may not be such a long time as I measured a 1V drop from the battery to the wedgie socket.
- They last a long time when they run below battery voltage
- gpx750r_original_lp_wedgie.JPG (214.33 KiB) Viewed 83793 times
I have thought about the regulator over-voltage situation and looked up where the regulator gets its sense from, somewhere off the switched +12V out of the the ignition switch. I'll probably have to insert a compact relay in the switched +12V to the regulator so that the regulator can get its sense direct from the battery without the losses through the standard wiring and ignition switch itself giving the regulator a falsely low volts indication.
Eventually I'll see about supplying the ignition coils +12V through a relay as well.
The bike does look nice when it is assembled but the engine does need a shine up. Some Syn-Lube "Bike Shine" that I have left over from the 80's should fix that.
I have not been able to figure out why the small side-panels at the rider's knees is a different colour to the rest of the bike. Plenty of pics of these bikes on the 'net show the same difference. Doesn't make sense and looks a bit bodgie.
- I like this colour scheme
- gpz750r0001.jpg (118.63 KiB) Viewed 83793 times
Re: GPX750R resurrection
Hi Denis,GPX Denis wrote:Great reading i am also in the process getting an 89 GPX 750 up and going just started so far rebuild kits in all master cylinders ,calipers and clutch slave cylinder having replaced the front brake hoses with braided racing set up ( both hoses straight out of the master cylinder ) nightmare getting the air out of the system your more advanced with your rebuild than i am but look forward to hearing more about it best of luck Denis
I wouldn't call what I am doing a "rebuild", it's more of a "freshen-up".
Eventually I'll do the hydraulics as you are doing.
Some brake piping layouts can be a real pain in the arse to bleed. On some cars, the piping runs across the firewall above the level of the master cylinder making a natural trap for air.
Bubbles love to go up but not down, it's how bubbles are and we can use that to our advantage.
One thing I do on tricky systems is a "reverse bleed". If I can get enough pressure to push the caliper pistons outward then I'm on the way.
If I have some suitable worn-out brake pads then so much the better.
With calipers mounted with the worn-out pads, I'd pump the pistons out as far as the disc would allow, then unbolt the caliper/s and put a lever between the pads to push the piston/s back in. Hopefully the upward (reverse) flow of fluid will take the air with it. The lever can be a pry bar or strong screwdriver.
Or course this will fill up the master cylinder so you may need something to suck fluid out of it.
A cheap plastic squeezy sauce bottle from the supermarket or $2 shop will do just that:
- For a bit of refinement, shove a length of clear fish-tank tube onto the nozzle.
- Sauce_bottle.JPG (144.4 KiB) Viewed 83762 times